Share


To upgrade the inspection capabilities of its measurement laboratory, the quality department at the Chassis & Safety division of automotive equipment manufacturer Continental, located in Veszpren, Hungary, invested in two LK Metrology Altera multi-sensor coordinate measuring machines (ёЯЕвВКБщєПІКs). Continental needed a high-capacity system capable of rapid inspection cycles combined with fast surface scanning and accurate feature measurements, the aim being to gain more comprehensive insight into the company’s products. These products range from electronic and hydraulic brake and chassis control systems to wheel and engine speed sensors, airbag electronics and electronic air suspension systems.

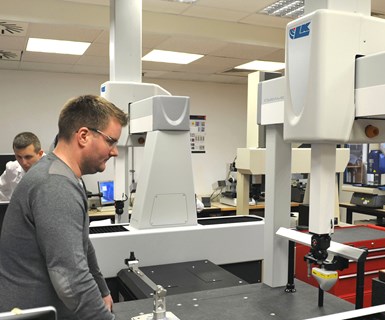
These two Altera 8.7.6 ёЯЕвВКБщєПІКs increased throughput and improved reporting for the Chassis & Safety measurement laboratory at Continental’s Veszpren, Hungary, location.
The quality department processes approximately 1,600 inspection reports per year, each consisting of about 20 measured parts. But Continental needed to gain quicker, more comprehensive insight and obtain more information per report.
More Capacity and More Capability
For a company that depends on its reputation for safety expertise, the quality department plays a pivotal role at Continental. Day-to-day tasks in the measurement laboratory include feature and surface inspection, linear dimension measurements and geometric dimensioning and tolerancing (GD&T) analysis to monitor production quality from the shop floor and assist in new product development.
In Continental’s measurement laboratory, a single ёЯЕвВКБщєПІК with touch probes was handling most of the inspection. Measuring technician Peter Somogyi advised that the main limitation of the pre-existing ёЯЕвВКБщєПІК was its slowness and hence low capacity. Quality engineer Tamas Brunner added that the software was not up to the department’s standards in respect to automated inspection and GD&T. With so many measuring tasks to process, the ёЯЕвВКБщєПІК was unable to keep up with throughput demands using touch-probe inspection, let alone provide the level of detail necessary. Mr. Brunner calculated that they needed to cut inspection cycle times in half.

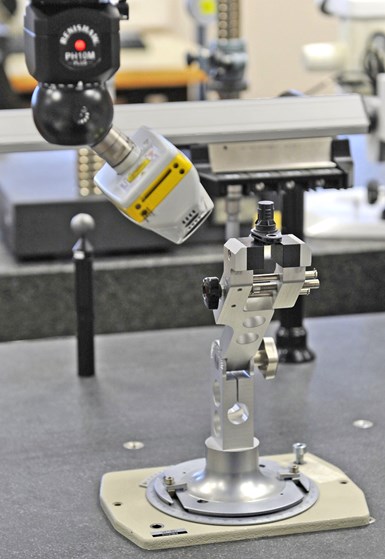
Laser scanning the body of an automatic braking system (ABS) speed sensor using a digital laser scanner.
Before beginning the search for a new solution, the quality department outlined its desire to use multi-sensor technology in the reorganization of the facilities. After consulting several ёЯЕвВКБщєПІК vendors, an Altera 8.7.6 ёЯЕвВКБщєПІК from LK Metrology was identified as the ideal solution. The decision was made to install two of them, each providing multi-sensor capability complemented by LK’s Camio software.
The Altera 8.7.6 features X-, Y- and Z-axis travels measuring 32, 28 and 24 inches, respectively. The ёЯЕвВКБщєПІК’s structure is optimized using computer-aided solid modeling and finite element analysis, particularly within the ceramic bridge section. The guideways use pre-loaded, wrap-around air bearings for higher stiffness. They run with a reduced air film thickness for lower energy consumption and repeatable measurement results, even at faster axis speeds, the company says.
In addition to Nikon LC15Dx digital laser scanners, Continental’s new ёЯЕвВКБщєПІКs include Renishaw TP200 tactile measuring probes. An ACR3 change rack provides smooth, automated exchange between tactile and non-contact probes, controlled by the Camio acquisition and processing software.

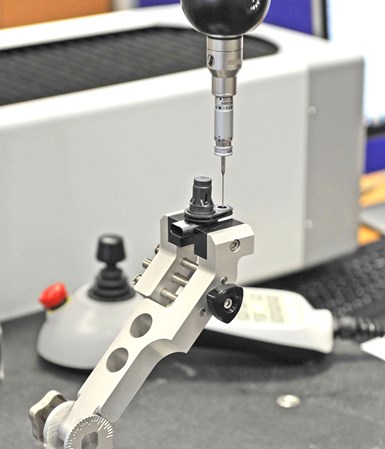
The Altera 8.7.6 measures the same part with a touch probe.
Better ёЯЕвВКБщєПІК Throughput and Reporting
Because the Altera ёЯЕвВКБщєПІКs store all measurement data and makes it available for reprocessing or further analysis, the new inspection system now serves as an important tool in handling potential customer claims. The quality of the new inspection process has introduced increased insight into critical dimensions, cavities and functional features of parts, enabling faster corrective action.
The direct benefits, such as faster inspection cycles and increased productivity as well as quick and easy report generation, are enabling Continental to meet its goals. “The multi-sensor ёЯЕвВКБщєПІК allows almost all types of measurements to be completed on one machine, whereas previously we needed to use multiple inspection machines, such as tactile probe, microscope, projector and conturograph,” Mr. Somogyi says.
“The graphical reporting is quick and easy to understand,” Mr. Brunner says. “Parts need to comply to many different tolerances, and the reports provide clear information.”
Since the twin, multi-sensor ёЯЕвВКБщєПІКs were installed in the quality department, the new equipment has provoked interest from Continental’s Molding Competence Center, which is evaluating how optical inspection can speed pre-production and development cycles.
Related Content
Turning Fixed-Body Plug Gages Inside Out
Fixed-body mechanical plug gages provide fast, high-performance measurement for tight-tolerance holes.
Read MoreRethink Quality Control to Increase Productivity, Decrease Scrap
Verifying parts is essential to documenting quality, and there are a few best practices that can make the quality control process more efficient.
Read More4 Ways to Establish Machine Accuracy
Understanding all the things that contribute to a machine’s full potential accuracy will inform what to prioritize when fine-tuning the machine.
Read MoreMeasuring Torque, Thrust Force for Smart Drilling Operations
To monitor drilling operations for smart manufacturing solutions, torque and thrust force can be measured.
Read MoreRead Next
Vision Systems: One Shop's Competitive Edge for Measurement and Inspection
Even for high-volume machine shops like Alpha Grainger, every part is critical. When the bottleneck to inspect a vast number of parts resulted in lost business, the company built, then invested in, digital vision systems to gain a competitive advantage.
Read MoreAMRs Are Moving Into Manufacturing: 4 Considerations for Implementation
AMRs can provide a flexible, easy-to-use automation platform so long as manufacturers choose a suitable task and prepare their facilities.
Read MoreMachine Shop MBA
Making Chips and ёЯЕвВКБщєПІК are teaming up for a new podcast series called Machine Shop MBA—designed to help manufacturers measure their success against the industry’s best. Through the lens of the Top Shops benchmarking program, the series explores the KPIs that set high-performing shops apart, from machine utilization and first-pass yield to employee engagement and revenue per employee.
Read More


